

Best Grow Tent Kits for Beginners: UK Guide
Table of Contents
- Best Grow Tent Kits for Beginners: Quick Comparison
- How We Evaluated These Kits
- Choosing the Right Tent Size and Plant Capacity
- Best LED Grow Lights for Beginners: What to Look For
- Grow Tent Ventilation Basics: Fans, Filters and Airflow
- How to Set Up a Grow Tent Kit in a Small Flat
- Total Setup and Running Costs for Beginners
- Kit Limitations and Upgrade Paths
- Conclusion: Which Grow Tent Kit Suits Your Space?
- Frequently Asked Questions
Last Updated: October 7, 2026
Best Grow Tent Kits for Beginners: Quick Comparison
Choosing the best grow tent kits for beginners means matching tent size, light coverage and ventilation to your room, not chasing the biggest specification.
A grow tent kit is a complete indoor growing package: a light-proof fabric tent, a frame, a matched grow light, and ventilation hardware sized to the space.
Below, we break down how to choose by space, light and airflow, what a realistic setup costs, and where a starter kit runs out of road.
How We Evaluated These Kits
We judged kits on four things a beginner can check before buying: usable growing space, light coverage and wattage, ventilation compatibility, and how much assembly and guesswork the kit removes.
Our own range runs from the compact GorillaBox Tent 0.6m x 0.6 x 1.6 (Std) at £67.64 to the Prodigy Tent 1.5m x 1.5 x 2.25 Silver Tent at £160.00, so the comparison reflects real stock.


| Tent Size | Typical Price | Plant Capacity | Best For |
|---|---|---|---|
| 0.6m x 0.6m | £67.64 | 1-2 small plants | Flats, herbs, single crop |
| 0.8m x 0.8m | Budget range | 2-3 compact plants | First serious grow |
| 1.0m x 1.0m | £110.52-£144.00 | 3-4 medium plants | All-round starter |
| 1.2m x 1.2m | £160.00 | 4-6 plants | Full home supply |
| 1.5m x 1.5m | £160.00-£200.00 | 6-9 plants | Enthusiast grows |
Choosing the Right Tent Size and Plant Capacity
Match tent dimensions to your room first, then to plant count. A 0.6m x 0.6m tent suits a corner or wardrobe alcove; a 1.2m x 1.2m tent needs floor space roughly the size of a double bed.
Plant capacity is a rough guide, not a rule: tall, bushy plants need more room than compact herbs. As a working estimate:
- 0.6m x 0.6m: one or two plants, or a herb shelf
- 1.0m x 1.0m: three to four medium plants
- 1.2m x 1.2m: four to six plants with room to train them
Height deserves equal attention. Most GorillaBox tents stand 1.4m to 2.0m tall, and taller options give headroom for a grow light plus the gap it needs above the canopy.
Best LED Grow Lights for Beginners: What to Look For
LED grow lights for beginners should be judged on usable canopy coverage and real power draw, not the biggest number on the box.
Most buying guides stop at "check the wattage", but wattage tells you what the unit pulls from the wall, not what it delivers to the canopy. Here is how to compare two lights properly, without a light meter.
The four numbers that actually matter
- Usable canopy coverage: the area the light illuminates at the manufacturer's recommended hanging height, measured in metres. This is the number to match against your tent footprint, not the tent's nominal size.
- Power draw (watts from the wall): the real consumption figure, usually printed on the driver or the rating label. This drives your electricity cost and your heat load.
- PPF (photosynthetic photon flux, µmol/s): the total light the fixture emits per second. Divide PPF by coverage area to get PPFD, the intensity that actually reaches the canopy.
A high-wattage, low-efficacy light can deliver less usable light than a lower-wattage, higher-efficacy unit, which is why wattage alone is a poor comparison tool.
A practical way to compare two lights
Take the PPF figure and divide it by the coverage area in square metres. A fixture rated at 600 µmol/s over 1.0m² delivers roughly 600 µmol/m²/s at the canopy.
For vegetative growth, most practitioners aim for roughly 200-400 µmol/m²/s at the canopy; for flowering, roughly 400-700 µmol/m²/s. Treat these as working ranges and follow the manufacturer's hanging-height guidance rather than guessing.
Spectrum without the marketing
"Full spectrum" is a description, not a specification. What matters is whether the spectrum suits the stage you are growing: a light tuned for leafy growth will not perform as well in flower as one with more red output. For a beginner running one tent through both stages, a broad-spectrum LED is the sensible default.
LED versus HPS for a small indoor setup
LED units run cooler and use less power per unit of usable light than older HPS lighting, which matters in a flat where heat build-up is a concern. HPS remains an option if you can manage the heat and higher running cost, but for a compact indoor setup, LED is the practical default.
Grow Tent Ventilation Basics: Fans, Filters and Airflow
Grow tent ventilation basics come down to one job: replacing hot, humid air with cooler fresh air, continuously.
Size the fan to the tent volume and the filter to the fan.
The carbon filter handles odor control: without one, the smell of a flowering crop travels through a flat quickly.
Airflow also prevents mold. Stagnant air pockets around dense foliage are where problems start, so add a small oscillating fan inside the tent to keep air moving across the canopy.
Prodigy Tent 1.5m x 1.5 x 2.25 Silver Tent →
How to Set Up a Grow Tent Kit in a Small Flat
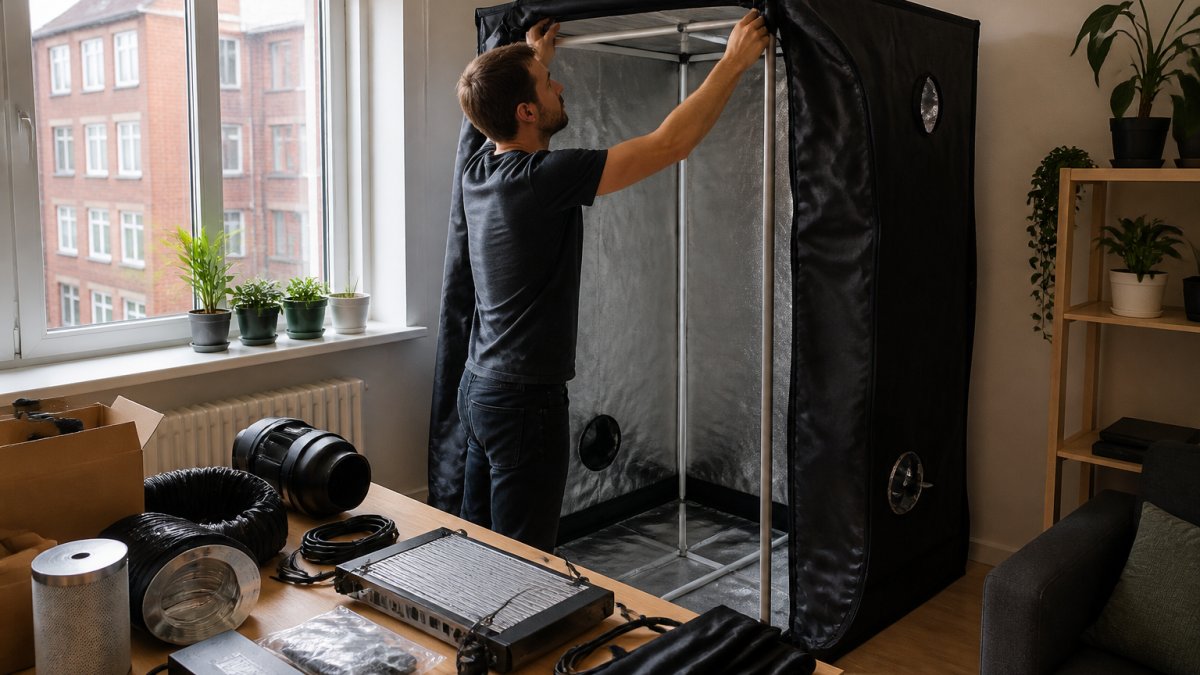
Setting up a grow tent kit in a small flat takes around an hour for a compact tent and needs no permanent modifications. Assemble the frame, fit the cover, hang the light and filter, then connect the ducting and fan. The steps are simple; the safety and heat checks around them are what most guides leave out.
The build, in order
- Clear the floor space and check the tent footprint against your room, including space for ducting and fan behind or beside it.
- Assemble the frame and click the corners together. Most compact tents use push-fit poles and plastic corners, so no tools are required.
- Slide the fabric cover over the frame and zip it closed. Check the zip runs freely before you load the tent.
- Hang the grow light from the top bars using the supplied straps, at the manufacturer's recommended height above the canopy.
- Mount the carbon filter at the top of the tent and connect ducting to the fan. Keep the duct run short and straight; every bend reduces airflow.
- Route the exhaust ducting to a window or vent. Seal the gap around the window opening so odour and warm air do not simply return to the room.
- Add a small clip fan inside for internal airflow across the canopy.
- Set the light timer and run the system empty for a day before planting, so you can check temperature, humidity and noise without a crop at risk.
Heat, airflow and electrical safety
A grow tent concentrates heat and humidity in a small volume, so a few checks matter more than the build.
- Ventilation first: run the extraction fan continuously, including overnight. Stopping it to save noise lets humidity spike during the dark period, when mould takes hold.
- Temperature swing: check high and low readings over a full light and dark cycle before planting. A large swing stresses plants and encourages condensation.
- Air movement inside: a small oscillating or clip fan keeps air moving across the canopy and prevents the stagnant pockets where mould starts.
Why the tent itself matters here
The light-proof construction of a quality tent allows a controlled day and night light cycle without outside light interfering, which matters in a flat where a bedroom lamp or street light would otherwise disrupt the schedule.
A compact tent suits a flat well. The GorillaBox Tent 0.6m x 0.6 x 1.4 (Std) at £67.64 fits a wardrobe alcove or corner without dominating a room, and its 16mm frame assembles without tools.

Total Setup and Running Costs for Beginners
Total beginner costs split into a one-off equipment spend and an ongoing electricity bill. The tent is the smallest part once you add lighting and ventilation.
Expect the upfront cost to cover:
- Tent: from £67.64 for a compact GorillaBox up to £200.00 for a larger white model
- Grow light: the single biggest line item, and the one that drives running cost
- Inline fan and carbon filter: a matched pair sized to your tent
Running costs are dominated by the light and extraction fan. Both run on timers, so the bill scales with hours and wattage. A smaller tent with a modest LED costs far less to run than a large tent with a high-wattage unit, which is why matching the light to the space pays off twice.
Kit Limitations and Upgrade Paths
Starter kits have real limits, and knowing them upfront saves money later. The tent usually outlasts everything else, so it is the one component worth buying slightly bigger than you need.
Where beginner kits fall short:
- Light coverage: bundled lights often suit the smallest tent in a range, not the largest
- Ventilation headroom: a fan sized for a 0.6m tent will not serve a 1.5m tent
- Accessories: timers, clip fans and meters are usually bought separately
The upgrade path is straightforward: start with a tent sized for your room, then upgrade the light and ventilation first as your ambitions grow.
If you are growing herbs for yourself in a small flat, a compact kit is not overkill, it is the right scale.
Conclusion: Which Grow Tent Kit Suits Your Space?
The right kit fits your room, your light coverage needs and your ventilation capacity, in that order.
At The Growers Shop, we stock tents from compact 0.6m models up to 1.5m and 2.4m options, all built with light-proof fabric, heavy-duty zips and sturdy frames, alongside the grow lights, ventilation hardware and nutrients to complete a setup.
Get started with The Growers Shop and build a grow tent setup matched to your space, your plants and your budget.
Frequently Asked Questions
What is the best grow tent setup for beginners?
A 1m x 1m x 2m tent suits most beginners: it fits a few plants without dominating a spare room. Pair it with an LED grow light, an inline fan, a carbon filter and ducting. The GorillaBox Tent 1.0m x 1.0 x 2.0 (Std) at £110.52 is a sensible starting point, and its light-proof 210D and 600D Mylar fabric keeps your day and night cycle stable.
What are the essential components included in a grow tent kit?
A complete kit covers the tent itself, a grow light, an inline or exhaust fan, a carbon filter, ducting, and a timer for the light cycle. Some kits also include pots, nutrients and reflective lining accessories. Check each listing carefully, because 'complete kit' means different things from different providers, and missing ventilation is the most common gap.
How do I choose the right size grow tent for my needs?
Measure your available floor space first, then work backwards. A 0.6m x 0.6m tent handles one or two small plants, a 1m x 1m tent suits three or four, and a 1.2m x 1.2m tent gives room for four to six depending on pot size. Remember you need access on at least two sides for watering and pruning.
Are all-in-one grow tent kits worth the investment for beginners?
They usually are, because matched components remove the guesswork around airflow and light coverage. Buying separately often costs more once you add ducting, clips and timers. A kit also means the fan, filter and tent inlets are sized to work together, which reduces humidity and odour problems later.
What ventilation requirements should I look for in a starter kit?
Look for an inline fan rated to move the full volume of your tent several times per hour, plus a carbon filter matched to that fan's airflow. Ducting should run short and straight where possible. Passive vents alone rarely control humidity in a sealed room, so active extraction is the safer choice.