
How to Maximise Plant Yields Indoors and Out
Quick Summary
Plant yields rise when you match light, food, water and space to what each crop needs. Start with a measurable target for each plant, test and correct your soil before planting, and feed according to growth stage. Then track harvest weight per plant and per square metre so you can change one variable at a time.
- Set a target for each crop: harvest weight or count, days to harvest, and space available.
- Test soil pH and nutrients from several spots, then correct pH before adjusting nutrients.
- Switch feed from nitrogen during vegetative growth to a PK-focused feed at flowering or fruiting.
- Water by moisture level 5-10 cm into the medium rather than on a fixed calendar schedule.
- Change one input per cycle and record results so you can see what actually improved yield.
Table of Contents
- How to Maximise Plant Yields Indoors and Out
- Start With a Clear Yield Target for Each Crop
- How to Improve Soil Fertility Before You Plant
- Building a Plant Nutrient Schedule That Matches Each Growth Stage
- Choosing Grow Lights That Give Plants the Light They Need
- Managing Grow Room Temperature and Humidity
- Watering, Pruning and Space Use to Lift Harvest Volume
- Your Next Step: Set Up a Seasonal Yield Plan
- Frequently Asked Questions
How to Maximise Plant Yields Indoors and Out
Last Updated: November 3, 2026
Plant yields rise when growers match light, food, water and space to what each crop actually needs. This guide walks through the steps that move the needle most, whether you grow in a flat, a greenhouse or a garden bed.
Research on crop productivity points to a real challenge. Crop yield gains are a recurring topic in agricultural research, and for home growers the practical conclusion is that gains come from managing the basics well, not from one magic product.
Start With a Clear Yield Target for Each Crop
Set a target before you buy anything. A tomato plant, a basil pot and a cannabis plant in a tent all have very different appetites for light and nutrients.
Write down three numbers for each crop:
- Expected harvest weight or count
- Days from planting to harvest
- Space available in pot, bed or tent
Once you have these, you can measure progress. If you planted four plants and harvested 20 per cent less than the target, you know to look at light, feeding or spacing first.
Watch out: Growers often judge a whole grow by its best plant. Track each plant separately so one weak specimen does not hide a wider problem.
How to Improve Soil Fertility Before You Plant
Good soil does more for yield than almost any add-on, but 'improve the soil' is useless advice unless you can measure what you started with and what changed. Treat soil prep as a three-step diagnostic: test, amend, retest.
Step 1: Test before you touch anything. Use a home soil-test kit or a laboratory test for pH, available nitrogen, phosphorus and potassium, and organic matter. Take samples from several spots across the bed or pot and mix them, because a single sample from one corner tells you almost nothing. For container growing, test the fresh medium before planting rather than the runoff.
Step 2: Read the result against your crop, not a generic target. Most vegetables and herbs crop best in a slightly acidic to neutral range, roughly pH 6.0 to 7.0, while some acid-loving plants need lower. If pH sits outside the crop's comfortable band, nutrients can be present in the soil but locked away from the roots, which shows up as pale leaves or slow growth despite feeding. Correct pH first; adjusting nutrients before pH is stable wastes money.
Step 3: Amend with a purpose.
- Low organic matter: dig in well-rotted compost or a living soil at roughly a 5-10 cm layer across the bed, or blend it through container medium before planting.
- Low nitrogen: add a slow-release organic source so it becomes available through the season rather than in one flush.
- Low phosphorus or potassium: choose a feed matched to the deficiency, and apply at label rates rather than doubling up.
- Compacted or heavy soil: add organic matter and avoid working it when wet, which smears the structure.
Step 4: Retest and record. Test again at the start of the next season and note the numbers alongside your harvest weights. That record is how you learn whether the amendment worked or whether you were simply feeding an already-fertile bed.
Watch out: adding compost and a concentrated feed at the same time can push nutrient levels past what the plant can use, causing salt build-up and leaf burn; change one input per cycle so you can attribute the result.
Building a Plant Nutrient Schedule That Matches Each Growth Stage
Plants need different nutrients at different stages. Feed heavily on nitrogen during leafy growth, then shift towards phosphorus and potassium once flowering or fruiting begins.
A practical schedule looks like this:
- Seedling: light feed, low strength
- Vegetative growth: full feed with nitrogen
- Flowering or fruiting: switch to a PK-focused feed
- Late flower: reduce or stop feeding as directed on the label
For the late-flower boost, Mills Nutrients Ultimate PK is a high-potency phosphorus and potassium booster rated at 0-7-6. It suits soil, coco and hydroponic systems. Rock Resinator 5L is another option for flower enhancement.

Always follow label dosing. Overfeeding causes nutrient burn, which cuts yield faster than underfeeding.
The feeding stages below summarise how the nutrient focus shifts as plants grow.
| Growth stage | Feed focus | Feed strength |
|---|---|---|
| Seedling | Light feed | Low strength |
| Vegetative growth | Nitrogen | Full feed |
| Flowering or fruiting | PK-focused feed | Switch from nitrogen |
| Late flower | Reduce or stop feeding | As directed on label |
Choosing Grow Lights That Give Plants the Light They Need
Light drives photosynthesis, so it sets your yield ceiling. Match light intensity to the space and the crop, then keep the lamp at a height that avoids bleaching or stretching.
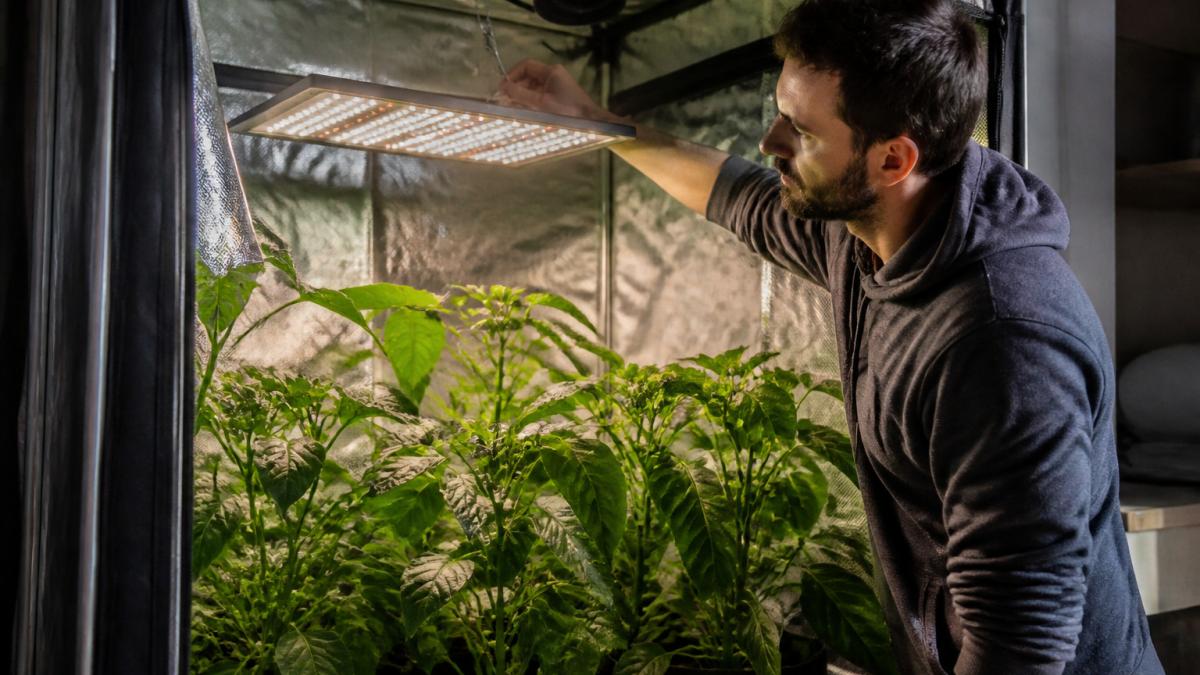
Check these points before you buy:
- Coverage area matches your tent or room size
- Output suits the growth stage you plan to run
- The unit has adjustable hanging height
!A gardener in a tidy UK home grow space adjusting a LED grow light above leafy plants in a tent
Managing Grow Room Temperature and Humidity
Temperature and humidity affect transpiration, nutrient uptake and disease risk. Keep them steady within the range your crop prefers, and avoid sudden swings.
A common mistake is letting humidity climb during flowering or fruiting, which invites mould. Use a humidity controller to hold your target automatically. The Cli-Mate Humi Controller humidistat is one way to do this.
Aim for airflow across the canopy, not just air movement in the room. Gentle, constant circulation dries the leaf surface and reduces disease pressure.
Watering, Pruning and Space Use to Lift Harvest Volume
Water, canopy and spacing decisions all feed the same number: harvest weight per plant or per square metre. Measure that number each cycle and you can tell which of the three is limiting you.
Water by moisture, not by calendar. Push a finger or a moisture meter 5-10 cm into the medium before watering. Water when the top layer is drying but before the pot feels light and the leaves lose turgor. Plants that dry out and flood in cycles yield less than plants kept evenly moist, because root hairs are damaged each time the medium swings from bone dry to saturated. Water in the morning where possible so foliage dries before evening, which lowers mould risk.
An automated timer removes the guesswork. The PLANT!T Water Timer can run from a tap or a gravity feed tank, with set duration and frequency controls.
Prune for light, not for tidiness. Remove dead, yellowing and crowded leaves that shade lower fruiting sites, and thin dense interior growth so air moves through the canopy. On fruiting crops, removing the lowest leaves and any sideshoots below the first flower cluster directs energy upward. Do not strip more than roughly a quarter of the leaf area at once; the plant needs leaves to power the fruit it is setting.
Train the canopy flat. Canopy management such as a SCROG net spreads the plant wide, so more bud sites receive light. The Bloomroom Crop Net 3.0 x 1.5m is designed for this technique, which encourages even, horizontal growth and makes harvesting easier. Keep the canopy level so all tops get similar light, and tuck growth under the net rather than cutting it where you can.
Use space by the square metre. Record the footprint of each bed or tent and divide your harvest weight by it. A crop that yields well per plant but wastes half the floor space may lose to a tighter, better-trained planting. Compare the same crop across seasons at the same density before changing varieties or feed.
Watch out: overwatering and underwatering look similar at first, both cause wilting, so check the medium before adding more water, because watering a drowned root zone speeds up root loss.
Your Next Step: Set Up a Seasonal Yield Plan
Put the steps together into one written plan. Note your yield targets, soil prep dates, feed schedule, light and climate settings, and watering and training tasks for each month.
Review the plan after each harvest. Compare actual yields with your targets, then change one variable at a time so you can see what worked. Small, recorded changes beat big guesses every season.
Last Updated: November 3, 2026
Frequently Asked Questions
What is the best way to increase plant yield?
The most reliable gains come from fixing the basics in order: healthy soil or a balanced feed, correct light intensity for the plant's stage, stable temperature and humidity, and consistent watering. Change one variable at a time and record your results. Most growers see the biggest improvement by tightening their nutrient schedule and environment rather than buying new equipment first. Keep a simple log of feed, light hours, temperature and harvest weight so you can see what actually made a difference.
Which nutrients help plants produce more?
Plants that flower or fruit need more phosphorus and potassium as they mature, while nitrogen matters most during early leafy growth. A dedicated bloom booster such as Mills Nutrients Ultimate PK, priced at £21.50, supports fruit development in the final weeks. Use feeds at the rates on the label, because overfeeding causes nutrient burn and reduces yield rather than increasing it. Flushing or reducing feed before harvest is also common practice.
How does lighting affect plant yields?
Light intensity and duration drive photosynthesis, so they have a direct effect on how much a plant can produce. Insufficient light stretches plants and lowers flower or fruit set, while too much heat from a poorly placed fixture can stress them. Match the light to the growth stage, keep the fixture at the height recommended by the manufacturer, and check leaf colour regularly. Training techniques such as a SCROG net, like the Bloomroom Crop Net in our range, help spread light evenly across the canopy.
What environmental conditions help plants produce a better harvest?
Most indoor crops perform well with stable temperatures and humidity that change little between day and night. Good air movement reduces the risk of mould and helps stems strengthen. If humidity stays high during flowering, mould risk rises sharply, so extraction and dehumidification matter as much as watering. Measure conditions with a thermometer and hygrometer in the canopy, not just at the wall, and adjust gradually rather than all at once.
